Hiking

Hike Review: Fish Creek Falls, Steamboat Springs, CO

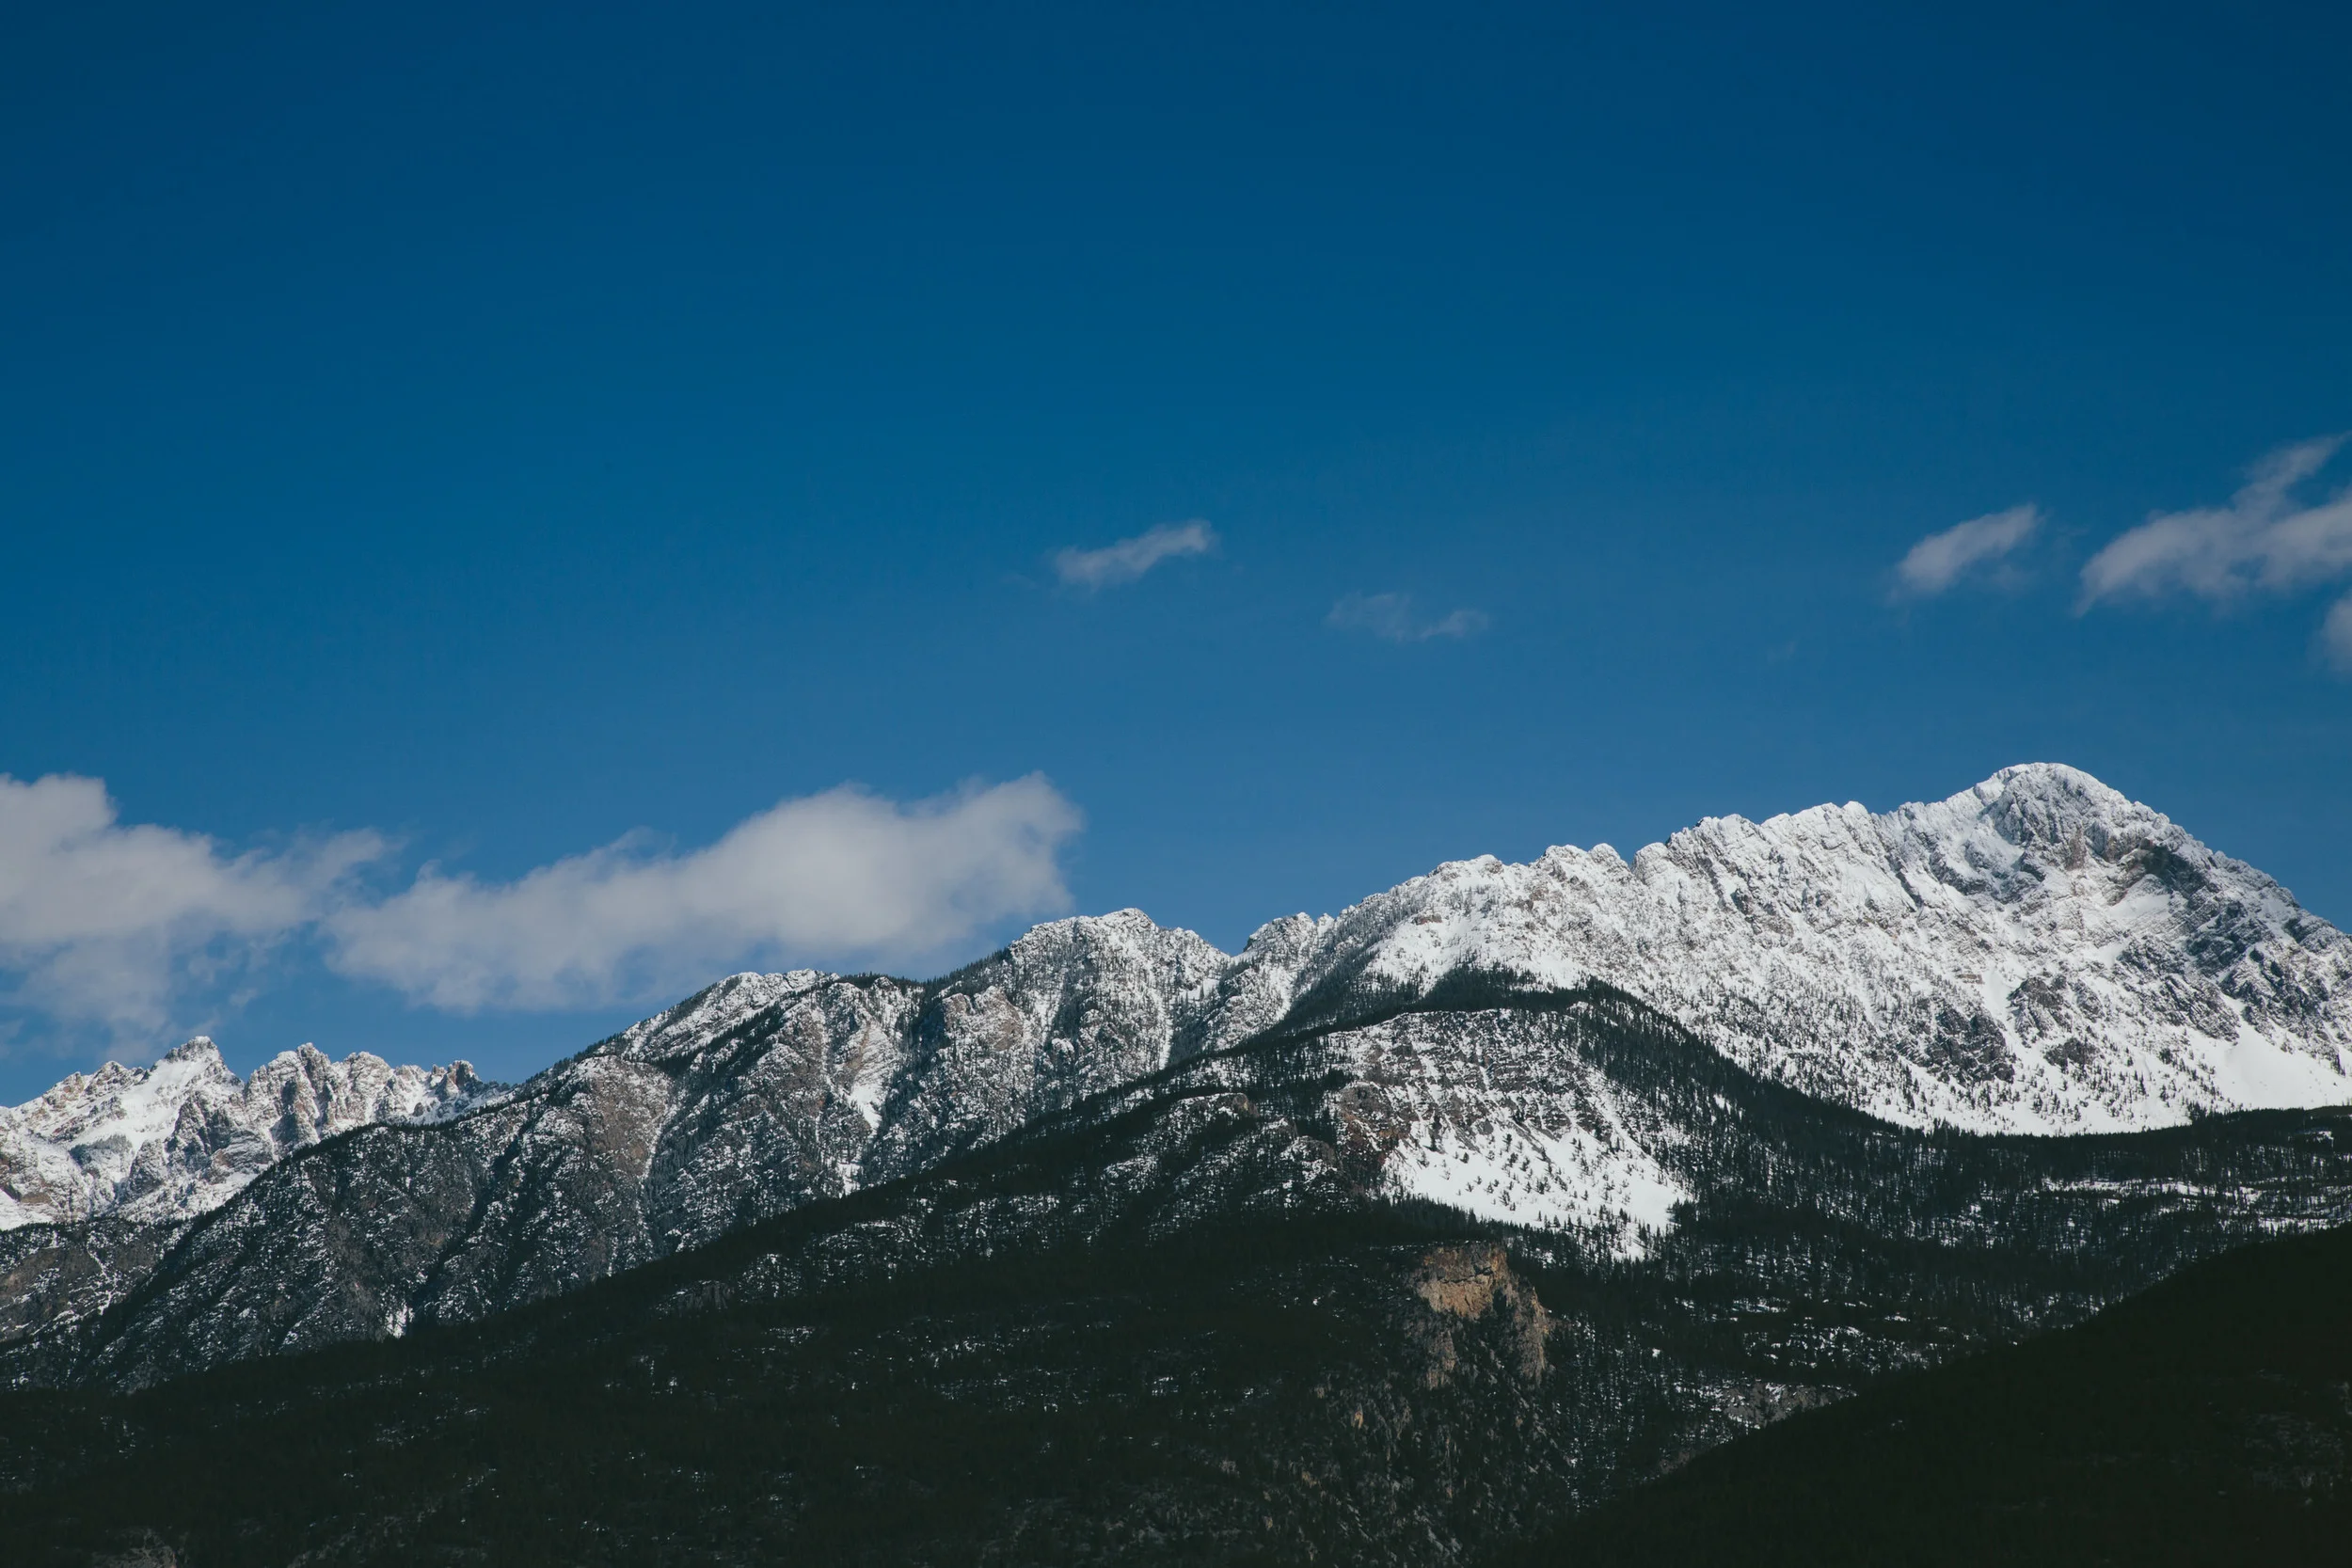
We recently took a long weekend camping trip to Steamboat Springs, Colorado to celebrate my husband’s birthday. He has lived in Colorado his entire life but had never been to Steamboat so it was awesome to celebrate him while exploring somewhere he had never been before.

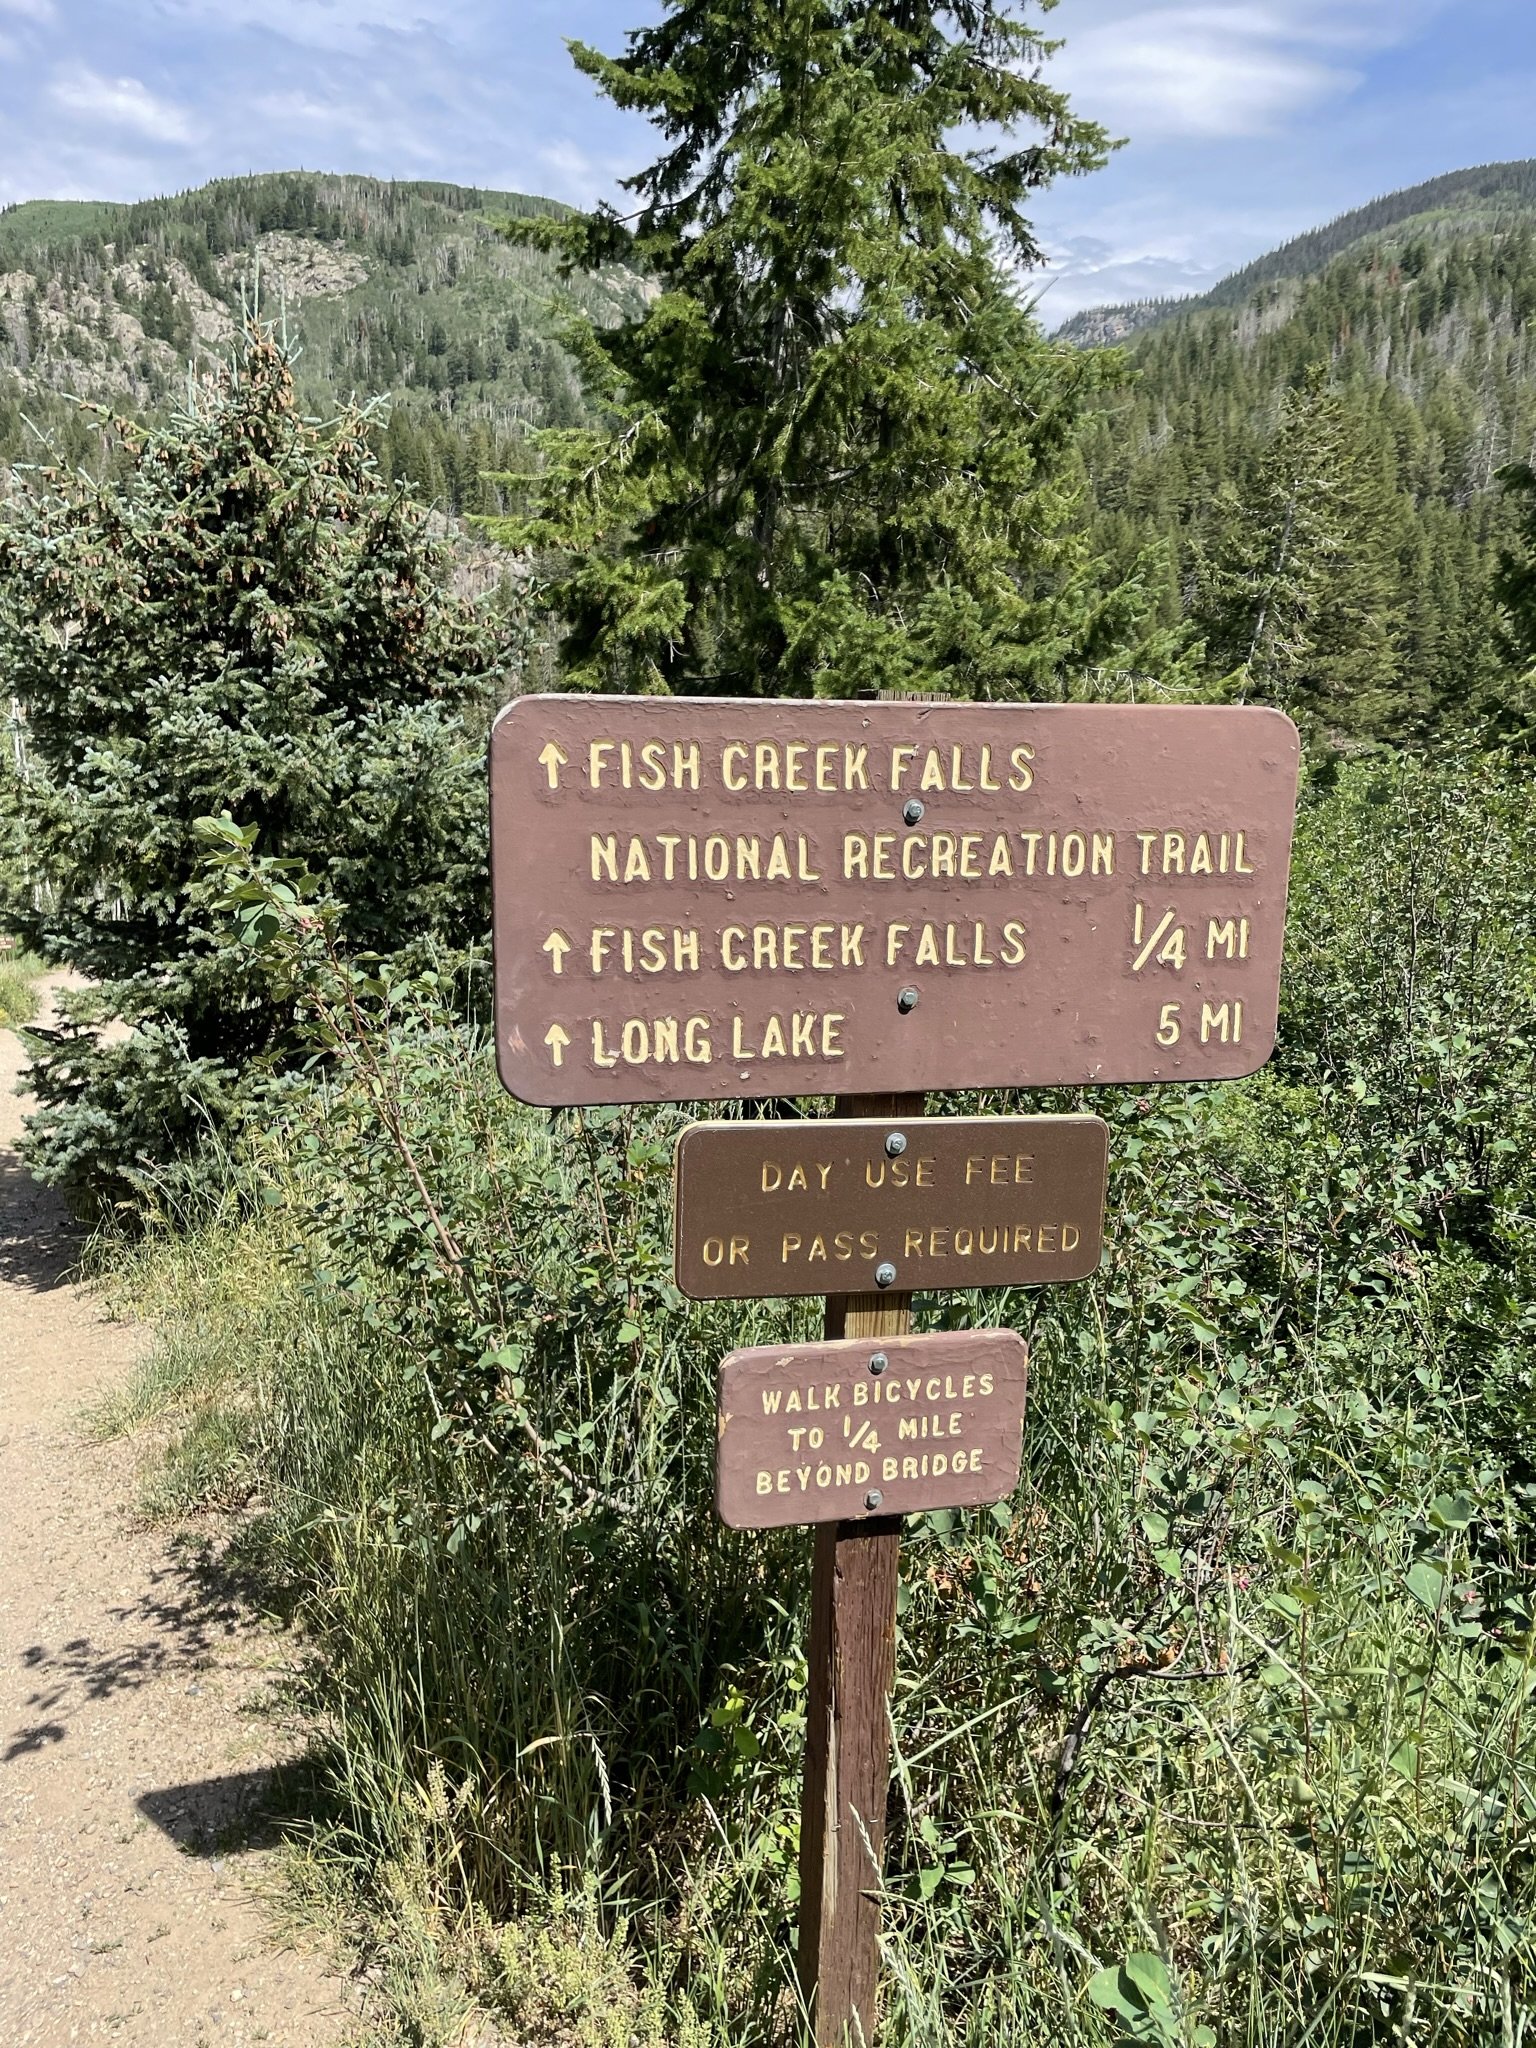
While we were camping, we decided to check out Fish Creek Falls - a well known hike and waterfall in Steamboat. There are small posted signs everywhere in town as to where the Falls are located vs where you you are standing and what direction you need to travel to get to them. Seeing all these signs made us feel like we had to check them out. And they did not disappoint!

Parking

There is a $5 fee to enter the parking lot. We were told if we had an America the Beautiful pass that the parking fee would be waved.

There are limited parking spots so on busy weekends they could fill up rather quickly.

Vault toilets were also in the parking lot, which is nice to see!

The hike

Awesome thing about this hike - there is a short hike and a long hike. Each of which are fantastic depending on what your overall desire and conditioning are.

The Short Hike - Fish Creek Falls

This hike is roughly a half-mile (0.5 mile) round trip. You start the hike going downhill and lose a lot of elevation very quickly. This is key to note as that means that your way out is going to be a pretty steep uphill hike.

You’ll know it when you get to the end of the short hike - you’ll have the most stunning view of the Falls.

The Long Hike - Long Lake

We didn’t make it all the way on the long hike. To be honest, we didn’t come prepared to go more than a few miles - I was in denim shorts and didn’t bring my hiker bag, just a small sling back that had more things in it for our doggo than it did for me. Definitely not enough water to make it on the longer hike.

But the section we did of it was beautiful and a steep grind.

You start out on the Short Hike and then proceed past the bridge and up you go, up the side of the mountain.

Apparently when you get to the top, you have an eye level view of the Falls that is supposed to be stunning. We will definitely be doing this the next time we are in Steamboat!

fish creek falls; steamboat springs; colorado; hikes; mountain hikes
waterfall; hiking; colorado waterfalls; fish creek falls; steamboat springs

Extra fun to be had

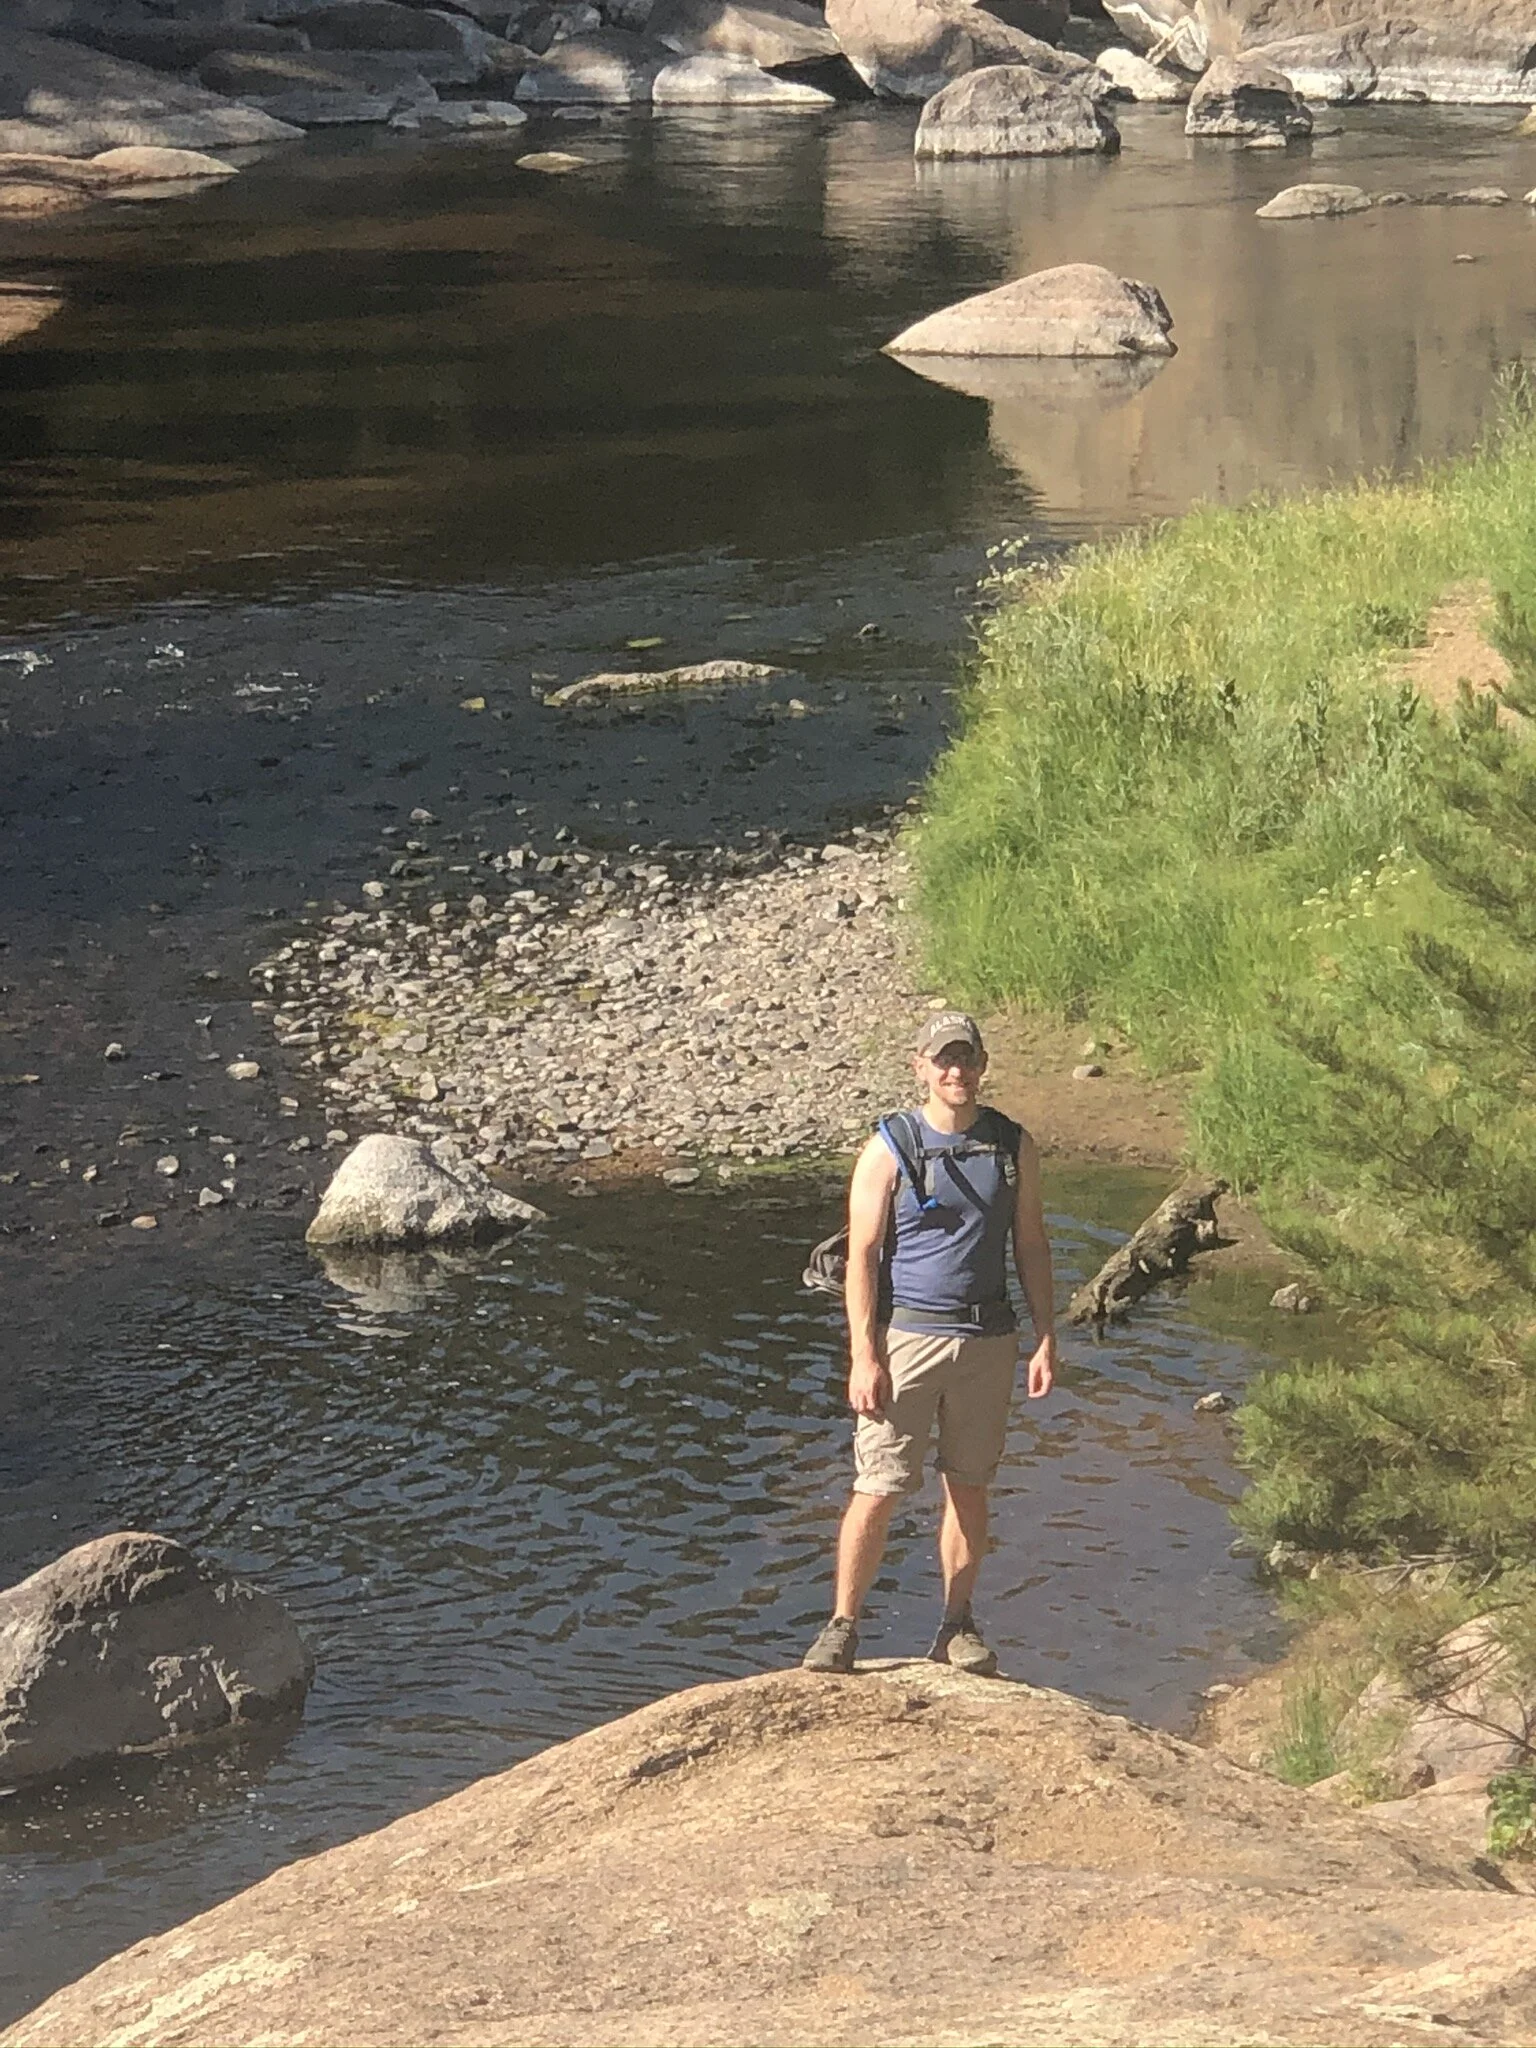
We hit the trail to the Falls on one of the hottest days of the year, so it should not have come to as big of a surprise as it did to find a ton of families at the river with their kids in swimming suits playing in the water.

The water was nice and cool - perfect for a scorching hot day in the mountains! We let Max, or doggo, play in the water for a while when we were on our way back to our car. He loved it!

fish creek falls; yellow lab; colorado mountain dog; river dog

Final thoughts

This hike is fantastic. I loved the option to do just the shorter hike to the viewing point as we didn’t come totally prepared for a longer hike. I also love that we could have continued on if we had come prepared to do so.

The fact that playing in the water was such a common thing made me smile and I know Max had the best time romping around in it.

It is an absolute must-do when you are in the Steamboat area.

fish creek falls; selfie; hiking; colorado hikes; waterfall hike; waterfall views
fish creek falls; fish creek; steamboat springs; steamboat colorado

Why You Need to Visit Moab, UT

If I had to pick a destination for a long weekend full of hiking and adventure, I’d pick Moab in a heartbeat.

The first time we visited, we stupidly picked the hottest time of year to visit - the end of July. As we pulled into town, the thermostat on our Jeep was reading 107 degrees. Whew. Lessoned learned the hard way.

But we made the best of it - getting up early to try to beat the heat, ending the day with a cold beer from either the Moab Brewery or at a fun restaurant. It was an absolutely awesome trip full of hiking, off-roading, and all the adventures one can dream up.

If you are an outdoors lover, look no further than Moab. You have unlimited access to hikes, amazing views (hello, Arches!), and great food to fill you up pre and post hike.

Sitting about 10 minutes from the entrance to Arches National Park, 30 from Canyonlands National Park, and 40 from Dead Horse State Park, Moab is the hub for all sorts of outdoor adventures.

Moab Utah; Greetings From; Visit Utah; Visit Moab

where we stayed

We decided we wanted a room that would have a small kitchenette to make breakfast ourselves since we were aiming to be up really early to hit the trails in the parks. After looking around extensively, we ended up booking a Bungalow at Moab Springs Ranch and loved it!

The Bungalow was cozy, with an amazing walk-in shower and AC that turned down extra low. The property was stunning and the service was top notch. I could not recommend Moab Springs Ranch enough!

must do Adventures

National Parks

There are 2 national parks very close to Moab - Canyonlands and Arches. We spent 2 full days exploring Arches and a half day in Canyonlands.

I highly recommend doing the Delicate Arch Trail to get out to the base of Delicate Arch in Arches.

In Canyonlands, it’s absolutely worth driving the entire drivable distance so you can get the full impact of the views that park provides.

Delicate Arch; Arches; Arches National Park; Hiking; Hiker; Hiker Chick

Delicate Arch, Arches National Park

Canyonlands; National Parks; Utah; Moab; Visit Utah; Hiking

Canyonlands National Park

Off-roading Adventure

Outside of visiting the National Parks, we booked an off-road 4x4 trail tour to tackle Hell’s Revenge. This was probably my favorite part of our entire trip.

We booked the “U Drive T-Rex 4x4 Tour”. It ended up being a reasonably small group which is great. Steve drove the entire time and we had an absolute blast.

Not only do you get to drive some crazy off-road trails, you get to see parts of Moab that are only accessible by off-road vehicle.

Hells Revenge; Off-roading; off road adventure; ATV; Utah; outdoor adventure
Hells Revenge; Off-roading; ATV; explore; Utah;

Hell’s Revenge Off-Roading

Where to eat

Filling Breakfast - Moab Diner. Also open for lunch and dinner, this diner is a classic and a must visit if you love good diner food.

Coffee - Moab Coffee Roasters.

Fancy Dinner - Josie Wyatt’s Grill. We ate here for a special date night out and loved it. It is on the pricy side, so don’t go here if you are expecting something cheap.

Beers - Moab Brewery. We love a local brewery and this did not disappoint. It also has a full kitchen which was a really nice surprise!

Moab Brewery; craft beer; Utah Brewery; Visit Moab; Visit Utah

We had a great time visiting Moab and hope we can get back there soon.

Happy Adventures!

visit utah; moab; arches; cayonlands; national parks; nps; be outdoors; opt outside

Hike Review: Lily Pad Lake, Summit County, CO

Lily Pad Lake Trail is a fairly easy out and back trail nested at the top of Wildernest in Summit County that gives you great views of Lake Dillon and the mountain towns surrounding the lake.

Parking

There are limited designated parking spots. If you park in a non-designated parking spot, you will probably end up getting a parking ticket as the area is frequently patrolled by the Summit County Sheriff.

The Trail

The first time I did this trail, we snowshoed to the lake and back and it was amazing. But, I must say, going in summer is a totally different experience and one that I highly recommend as you learn very quickly why it is called Lily Pad Lake. In winter, the lake is frozen over and buried under feet of snow. In summer, it’s just gorgeous.

lily pad lake; colorado lakes; colorado wilderness; wildernest national forest; hiking

The hike itself can be done in about an hour and a half, but I would absolutely budget in some time to just chill at the lake. It was so calm and peaceful.

As you hike, you’re going to come across a mini lake that we thought was the Lily Pad Lake because it was absolutely covered in Lily Pads. But if you continue on, you’ll end up at the larger lake - the true Lily Pad Lake.

lily pad; lake; colorado lakes; hikes; lake hike; lake view

Smaller lake that is covered in Lily Pads! Continue on the trail to get to the actual Lily Pad lake.

Why We Loved This Hike

It’s short - only about 3 1/2 miles round trip. It’s beautiful. And dogs are allowed, on leash. We love taking Max out with us when we go hiking, but certain places do not allow dogs, so it’s an added benefit that he was able to join us.

Final Review

4 out of 5! I wish there were a few more parking spots at the trail head and that it was a tad bit longer. But it is a very solid and fun hike that ends with stunning mountain views at the lakes edge.

Eagles Nest Wildernest; National Forest; Hiking; Colorado; Summit County
trail, hiking trail, lily pad lake trail, colorado hikes, mountain views
lily pad lake; hiking; colorado hikes, hiker dog; yellow lab

Beginners Guide: 3 Tips to Get Started Snowshoeing

Please note, this post contains affiliate links. See our Disclosures Page for more info.

Winter is here and we LOVE it. It’s one of our favorite times to be outside. Yes, it’s colder. Yes, it gets darker faster. Yes, you have to wear a ton of layers. But there are so many fun activities you can do in winter that you can’t do any time of year. One of our favorite ones is snowshoeing! If you love to hike and are looking for a way to do so in winter, snowshoeing is the way to go for you! Read on for our top 3 tips to get you started snowshoeing!

IMG_9587.JPEG

1. what do you wear?

This is the #1 question we get and it’s a great question. It can seem daunting to figure out how to stay warm and keep your feet dry. Our biggest tip - wear layers. You can always take some off if you get too warm (and yes, you can definitely get too warm even when it’s 20 degrees outside!).

I recommend wearing a warm base layer - running/active leggings and a tight fitting cold-gear top. Purchase some wool socks (we love the Smartwool brand) so your feet stay as warm as possible.

For your outer layer, if it is forecasted to be really cold or has snowed a ton the last few days, we wear snowpants over our leggings. On the top, we wear a coat that is built for cold activities, either a ski coat or a down coat. I personally love the Eddie Bauer light weight down coats - they have some that are rated to -20 degrees that are perfect for snowshoeing! If it hasn’t snowed or isn’t going to be too cold, I just go with leggings, no snowpants, and Steve goes for hiking pants. We still tend to wear a warmer coat.

Waterproof Boots. Besides having good layers, wearing waterproof boots is a MUST. Frozen toes are never fun. Wet, frozen toes are even worse. So find yourself some waterproof sturdy boots. I either wear Sorel snowboots that come up to about mid-calf, or I wear waterproof Merrel hiking boots that are made for winter (aka, they are lined on the inside to keep your feet extra toasty).

Sunglasses or ski goggles. If it’s sunny outside, you are going to want sunglasses. The sun reflecting on the snow makes for an extra bright day! We also will sub our sunglasses our for ski goggles. These wrap around our eyes more and block the glare off the snow in our peripheral vision which is really nice on a extra sunny day. If you want a cheaper pair of sunglasses to wear while being active outdoors that are polarized and don’t slip when you sweat, check these out.

A winter hat or ear warmers. There is not much worse than cold ears! Don’t forget to wear a hat or ear warmers to keep them warm. I know if I forget one, I’m signing myself up for a major ear ache the rest of the day.

Gloves. Keep those hands warm! If it’s going to be extra cold, it never hurts to throw some handwarmers in your gloves too.

IMG_0375.JPEG

2. where do you get snowshoes? and what kind should i get?

You can purchase snowshoes at pretty much any outdoor gear store - REI, Christy Sports, Cabella’s, etc. You can also purchase them at Costco right around the holiday season, but once they are out, they don’t seem to get more shipments.

Brand wise, there are a few out there that are well known, and they have ranges of prices for their equipment. Tubbs, MSR, and Crescent all have great reviews and good ranges of prices for what you are looking for.

We purchased our first ones, beginner level, cheaper snowshoes on Amazon for ~$60 a pair, and honestly, they were an “off brand”. But they worked great for what we were wanting - a pair of snowshoes that we could learn with and not worry too much of beating them up or doing something wrong. Plus, we thought we would love snowshoeing, but if it had turned out we actually didn’t, we wouldn’t have been out a ton of money on gear. We have since purchased better ones from REI and are hoping they last us a long time since they were pricy!

If you are not sure you want to invest in your own snowshoes yet, you can rent them from REI! We love this as it will allow for you to give snowshoeing a try without too much investment.

3. how do i find a trail to snowshoe?

This is also a great question and we have learned the hard way that a “moderate” trail in summer is a LOT harder in snowshoes! Besides what to wear and what gear to get, this is the biggest thing to research so you can have the best experience.

We use the app AllTrails to find all our trails. To snowshoe, we recommend looking for a trail that is rated as “easy” - remember that snowshoeing is more difficult that standard hiking - with a distance in the 3-5 mile range.

Read the reviews on the app. A lot of users will put the conditions of the trail in their reviews and how they went about it. If there are no recent reviews, maybe add it to a list to look at again later if you like the look of it, and keep searching until you find one with more recent reviews so you know what to expect.

We hope you have a blast on the trails! If you have any specific questions, shoot us an email through our contact page, or leave it in the comments below!

Happy adventures!

Liz

07562836-3061-4CD9-8731-12093113D61D-2.jpg
IMG_9672.JPEG
Beginners Guide to Snowshoeing.png
IMG_4611.jpg

GUEST BLOG: JustTwoBrosTravel - Isle Royale

You guys, we are SO excited to introduce you to an awesome brother and sister duo, Eric Anthony and Whitney Anthony, from JustTwoBrosTravel who are guest blogging about their most recent travel excursion to Isle Royale National Park! Be sure to check out their site, www.justtwobrostravel.com to read about all the other amazing places they have been to! You can also keep up with all their adventures on Instagram @justtwobrostravel. Take it away JustTwoBros!

~ Liz

JustTwoBrosTravel - Isle Royale

By Eric Anthony & Whitney Anthony

We're back! In a time of disease & uncertainty, we found a way to add a National Park to our list. This time we voyaged out to Isle Royale National Park in Upper Michigan.

JustTwoBros 1.jpg

Eric A spent a few months trying to put some longer road trips together, to no avail. With Covid- 19 hanging in the air, to cross state lines park to park & get the experience we'd prefer, it just wasn't happening. After some thinking & a month's worth of planning, we picked the Isle.

We already knew the park wasn't visited all that often. They offer a much shorter season than most parks, April until November, but in 2020, the season was even shorter then that. Unlike some of the more popular parks, it's not easy to get to. Most people don't want to put the effort into the planning so fewer people visit.

When it comes to getting there, you can ferry from the Houghton Visitor Center in Houghton. Michigan, or fly by sea plane from either Hancock, Michigan or Grand Marais, Minnesota. This year however, Isle Royale is only offering entrance by sea plane or personally owned boats only, due to the virus. So we went with the obvious choice, the seaplane!

JustTwoBros 3 .jpg

Isle Royale Seaplanes, is a husband & wife owned business that transports people by plane over to Isle Royale during the season. We found them pretty early on, mostly because they have the only license to do so. They were really informative & the price was more than reasonable for one of the best experiences you could ask for.

JustTwoBros 2.1.jpg

When you decide to start planning your trip, you need to start by figuring out what your goal is. Do you want to hike the entirety of the park from one end to the other (45.98 miles) or just pick a side & do some day hikes? No matter which you choose, you have to pick the side you want to start or end up on. You can pick the Rock Harbor side or the other side, Windigo, we chose Rock Harbor. Typically with a normal season, the island offers lodging, camping & restaurants; they also have a great little mock REI at the Rock Harbor store where you can buy camp fuel, some clothing & camp gear, food & beer. This year however, the lodging & restaurant were not open. Also for anyone choosing to visit during Covid, you have to pre- order your cooking fuel through the Isle Royale Sea Plane website, & they'll have it at the visitor center you choose when you arrive.

This park is slightly different than most when it comes to camping, because it's pretty much a back packer's park. When you show up, unless it's by personal water craft, you're left to carry your gear to the campsite of your choice. Something you should also know, about your gear at this park though, is you need significantly less. Most, if not all of the campsites marked on the map have small makeshift cabins on them, which are first come first serve & you can't stay more than three nights. Now these aren't your grandpa's cabins... or maybe they are! The cabins are more or less 3 walls with a roof & a bug screen on the front. What is great though, is if you plan right, you really don't need a tent, sleeping pads & bags are really all you need. That being said, we only did day hikes, that might not be the case if you're hiking the entire island. Finally, something you will need to bring with if you don't have one, is a water filter. We stayed mostly on Lake Superior, so all we did was filter our water, boil it in the Jetboil, move it back into our water bottles & let it float in the lake until it got cold again. You don't necessarily need step two but if you like to use iodine pills & didn't bring any, the boiling will do the exact same job. For any other questions, we spent about 3 weeks talking to the rangers at the Houghton Visitor Center (over the phone) & they were very helpful. Another resource for camping is the park newspaper, The Greenstone. The paper has charts on it that show you distances between campsites & whether or not they allow fires.

JustTwoBros 4.jpg

We spent our first two nights on the island at Daisy Farm. It's usually boat traffic heavy with a lot of people & little space, but with the visitation of the park so low this season, we had no problem getting a cabin & getting comfortable.

We were hell bent on seeing moose while we were there. This was supposed to be a good year to see them with so few people on the island. We were recommended the Greenstone Triangle to head out & see if we could find one. Moose typically eat in the morning & at night & spend the hotter parts of the day resting & trying to stay cool. We headed out in the morning to see if we'd have any luck... we didn't. We saw red squirrels & a wood pecker but no moose. As a matter of fact, the entire 3 days we were on the island we never saw one. Aside from the afore mentioned animals, we saw a bunch of merganser, butterflies, beavers, & otters. There's more to Isle Royale than just moose & wolves & we were happy to see it.

JustTwoBros 5.1.jpg

The entirety of the outskirts of the park lies on Lake Superior. However, there's also plenty of places to hike inland. That said, you should be ready for thick marsh & tree growth. We packed bug spray galore & treated our clothes. Whitney A wore a mosquito net & it helped. This wasn't their heavy mosquito season but the black flies were nasty & went off on a biting frenzy, make sure you're physically & mentally prepared for that.

The treks are tough & weather can change at any moment, but we highly recommend this to anyone who loves wildlife & anyone who truly wants to get away from car camping. The seaplane ride over, should you choose to take it, will blow your mind. Make Isle Royale your next pandemic vacation & you won't be disappointed!

For more photos of their Isle Royale adventure, check out their website here.

Hike Review: Cheesman Canyon, Sedalia, CO

Cheesman Canyon is one of those hikes that has been on our list but not a high priority to do, thinking it wouldn’t be anything overly amazing. Well, we finally can cross this one off and, wow were we wrong! This hike has so much about it that we loved. In fact, the only thing we would say is a downfall is that there is very little shade. But, we did pick one of the hottest weekends of the summer to do this hike, so really that is our own fault, as this hike would be absolutely perfect on a warm but not blazing hot day.

Keep reading for our full review as to why we loved it!

IMG_1753.JPEG
IMG_1761.JPEG
  1. The hike is along a river!

    Yes, you literally hike along the river for the majority of the hike! There are a ton of fishermen around and a lot of access points from the upper trail to the water. So if you get too hot, you can work your way down to the water to cool off.

  2. Good ups and downs the whole way.

    We love a good hike that is pretty equal effort both ways. This is not a hike that is up one way and down the way back. You get the challenges of inclines and declines both ways. This means that you don’t have a ton of overall elevation gain (you never get above treeline) but you get the workout associated with a strong elevation gain!

  3. If you go far enough, you hit a reservoir.

    We did not make it far enough in on this hike to hit the reservoir (hello, 100 degrees by 10am!) but if we were to have kept going, there would have been a reservoir for us to sit by and enjoy. The reservoir feeds the river that you hike along. Needless to say, we will be back to get to the reservoir on a cooler day!

  4. Not overly busy.

    We arrived at the parking lot by about 8am and had no issues parking. However, when we were leaving there were cars circling the lot waiting for a space. There is no street parking - if you park on the street you will get ticketed if caught.

We will warn you that the trail is mostly loose gravel - meaning that the declines are slippery and your feet can definitely come out from underneath you if you aren’t overly cautious. Yes, speaking from experience on that one. Whoops! Luckily I only scraped my hand a little bit, but it could have been much worse!

Overall, we give this hike a 4 out of 5 stars.

Happy Trails!
Liz

IMG_1751.JPEG
IMG_1768.JPEG
IMG_1788.JPEG
IMG_1802.JPEG
Hike Review Cheesman Canyon.jpg

Hiking Pack List - Everything We Carry and Why

Please note, this post contains affiliate links. See our Disclosures Page for more info.

Interested in knowing what we pack for a day hike? Look no further! We have listed out everything we pack, from Must Haves to Nice to Haves in our post below. You can download this complete list HERE on our Free Resources page.

Gear Must Haves

  • Hiking Backpack. We are big advocates of buying a backpack specific to hiking that has a built in water bladder. It makes it much easier to stay hydrated as you hike. See the one Liz uses HERE and the one Steve has HERE.

  • Hiking Shoes/Boots. The extra support and extra grip that are provided from hiking specific shoes/boots makes the investment worth it. Tip: spend the extra dollars and purchase ones that come waterproofed. Worth every extra dollar to keep your feet drier! Liz wears Merrell Shoes and Steve wears Columbia Shoes.

  • Wool Socks. Yes, seriously even when it’s 100 degrees outside. These socks are made to never rub so you can say good-bye to blisters from socks rubbing!

  • Full water bladder / water bottles. If your hiking pack has a water bladder, be sure to fill it with more water than you think you need. If you don’t have a water bladder, we’d recommend Nalgene water bottles. They are extremely durable and can hold up to 32oz of water in each bottle.

  • First Aid Kit. This is one thing you hope you never need, but if you do need it, you will be glad you have one!

  • Sunscreen. Sunburns HURT and the higher in elevation you go, the more exposed your skin will be. Protect your skin by coating up before you begin your hike, and re-coat as needed.

  • Chapstick with sunscreen. Sunburned lips are zero fun. This also helps protect them from windburn.

  • Hat with sun-visor. Help your face out and wear something that provides some shade.

  • Sunglasses.

  • Raincoat. Unless there is a zero point zero percent chance of rain, we always pack raincoats. And even then, we probably still have them in our packs as weather in the mountains can change rapidly. Check out these two coats - MEN’S and WOMEN’S. They both fold into one of their pockets. Major space saver!

  • Necessary medicine, like an inhaler, that is not included in your first aid kit.

  • Trail snacks. We typically carry Clif Bars and some sort of sandwich for the day. If it’s super hot out, we will carry something salty to munch on as well.

  • Warmer outer layer - time of year and time of day/night depending. If we are doing a sunrise or sunset hike, we will for sure have a warmer layer with us

  • Cell Phone. Not only to call for help if needed, but to take photos of the day if you don’t want to carry a larger camera.

Gear Nice to Haves

If you have extra room in your pack, these are great add-in options that we like to take!

  • Bug spray. Especially if you are going to be near water.

  • Hand sanitizer

  • Baby wipes - we use these to wipe our hands off prior to eating and to also clean up our legs if we get caked in dirt/mud on the hike.

  • Swiss Army Knife

  • Gum / mints.

  • Kleenex / tissues

  • Trash Bag. Help keep nature natural and pick up trash as you hike. Or just put your own in it.

  • Sandals. Ever get to a lake or river and wish you had sandals to put on for a while? Worth bringing if you know you’re going to end up at a lake or river.

  • Extra socks

  • Collapsible trail stool. We recently added these to our hiking gear and what a game changer they are! You have a place to sit wherever you go - no more looking for a decent rock or dry ground to perch on.

Carry something that we don’t? Let us know in the comments!

Happy Trails!

~ Liz

IMG_1776.JPEG
IMG_1236.JPEG
IMG_1121.JPEG
IMG_0999.JPEG
IMG_1009.JPEG
IMG_1007.JPEG
Complete Pack List for Day Hike.png

Hike Review: Tyndall Glacier and Nymph, Dream, Emerald, and Haiyaha Lakes, Rocky Mountain National Park, CO

Disclaimer: this is an opinion about our personal experience of this hike. Others may have a different opinion, and that is perfectly acceptable. Everyone has a right to their own opinion.

This particular hike we come back to time and again because of how beautiful the scenery is. Located in Rocky Mountain National Park, this hike features so many amazing things, you can’t help but just be in awe the entire hike. 4 lakes. A couple waterfalls. A glacier. It’s one of our all time favorites and we hope you enjoy it as well if you choose to hike it!

IMG_1343.jpg

Getting into RMNP

This year, you must reserve a time slot entry to get into RMNP, as well as have a pass to get into the park for the day. The pass can be a season pass, a day pass, the American the Beautiful Pass, etc. This has changed from prior years due to the Covid-19 outbreak. They do not offer these time slot entries at the gate so you much reserve them online in advance. To do that, you can CLICK HERE or log into recreation.gov, search for Rocky Mountain National Park, pick a date that has available time slots and pick your time! Once you pick your time, you have two hours to enter the park, so if you purchase the 8am entry, you have from 8am - 10am to enter the park. Once you are in the park, you can stay as long as you want. Be sure to take a screenshot of your confirmation on your phone, or print it out, as you will have to show it at the gate.

IMG_1202.jpg

Where to park

Parking is all over the park once you get in, but watch for the road signs on what is full. If you can, we recommend parking at Bear Lake Lot - it’s the closest parking lot to the trail head. We say “if you can” because this lot fills up FAST. If it’s full, we recommend the park-and-ride lot. It’s easiest to find parking and you will have quick access to a shuttle bus that will take you up to Bear Lake and will have access to the same shuttles to take you back to your car when you are ready to head out.

The Elevation

This hike is a 5.1 mile out and back hike that has an elevation gain of ~1,100 feet. Keep in mind that you are starting at a very high elevation already at 9,449 ft above sea level. Entering the park, you will be at 7,860, and you will gain substantial elevation driving up to Bear Lake. Bring more water than you think you’ll need, snacks, and something with salt - your body might need it.

If you are coming from out of state, be sure to read about elevation sickness and the warning signs - it’s a very real thing and it’s not fun if you have it.

The Hike Itself

This hike is STUNNING. There are four lakes - five if you count Bear Lake - and they are so gorgeous. Our favorite one… it’s hard to pick! But if I had to, the lake at the base of the glacier is unreal and totally makes the hike. Be sure to look into the water as you walk by as you can some time see some fish swimming along.

DSCN0336.JPG

We went in mid-June and there were still patches of snow on the hike. We did not have to use any gear other than our hiking boots, and saw some people in regular tennis shoes cross through the snow patches with no issues.

Rocky Mountain National Park is stunning and this hike showcases it to the nth degree. We absolutely love it and tend to hike this at least once a year. We give this hike a rare 5 out of 5 stars. Let us know what you think when you hike this as well!

Additional Resources You Might Enjoy:

Hike Review: Eagle’s View Trail

Day Trip Hiking Pack List

DSCN0354.JPG
DSCN0379.JPG
IMG_1390.JPEG
IMG_1431.JPEG
Hike Review_ Tyndall Glacier, Nymph, Dream, Emerald Lakes.jpg

Hike Review: Eagle's View Trail Loop, Conifer, CO

Disclaimer: this is an opinion about our personal experience of this hike. Others may have a different opinion, and that is perfectly acceptable. Everyone has a right to their own opinion.

We’ve absolutely been loving the Conifer hikes lately. There is something to be said about finding hikes that are only 30ish minutes away from Denver! This hike is just south of Conifer in Reynolds Park. Considering how close this hike is to Denver, we headed out early to try to beat the crowds - and we are very happy we did! Here’s what we think you need to know about this hike!

IMG_1264.JPEG

Parking is free and the lot is actually decently sized.

We were pleasantly surprised to see a decent sized lot at the trail head that easily could fit 20 cars (or more) without having to park parallel or on the street! We arrived around 8:15 and had no issue finding a parking spot.

There are restrooms at the trail head.

Woohoo! This is always a great surprise when we see this. As comfortable as we are peeing in the woods, it’s always nice to not actually have to since a restroom is available!

The view makes this hike worth it.

The hike itself is a 4.2 mile loop trail which doesn’t sound too long, but considering the elevation gain you have during the first mile of the hike, we were glad it was on the shorter side. We went counter-clockwise and got a killer booty/hamstring/calf muscle workout in! Coming off the steep and steady incline and seeing the valley and mountain ridges for miles and miles and miles.. yeah, those views are why you do this hike.

IMG_1251.JPEG

Dogs are allowed on leash.

Unlike the Maxwell Falls hike we did, we did not see any dog poop on the trail! Thank you responsible dog owners!! This hike is STEEP and a good portion of it is not shaded, so if you bring the pups, be sure to bring them their own water. You do not want to be that dog owner that has to call the park rangers for assistance on getting their dog carried out after the doggo overheated. Yes, that happens.

We rate this hike 4.5/5 stars!

We loved the challenging incline on this hike, especially with the shorter distance this hike is. With the early start, we didn’t see more than 10 people on the trail until we were almost back to the parking lot. Having restrooms, a nice sided parking lot, and it being only a 30ish minute drive from where we live definitely adds stars to this hike for us.

If you hit this trial, let us know what you think by leaving a comment or sending us an email! We love hearing about everyone’s experiences!

Happy Trails!
~ Liz

IMG_1236.JPEG
IMG_1229.JPEG
IMG_1204.JPEG
IMG_1228.JPEG
Hike Review_ Eagles View Trail.jpg

Hike Review: Maxwell Falls Trail, Conifer, CO

Disclaimer: this is an opinion about our personal experience of this hike. Others may have a different opinion, and that is perfectly acceptable. Everyone has a right to their own opinion.

We had high hopes for this hike - it is roughly a 30 minute drive from Denver, is a loop trail, and has a waterfall. We love loop trails and really loving having some features other than it being just a hike to be hiking. If it’s an out and back trail, we love if the hike ends at a lake, waterfall, river, etc. So this being a loop and having a waterfall? Sign us up!

DSCN0322.JPG

Here’s what we think you need to know about this hike:

1. It is VERY crowded.

And we mean VERY. This hike had more people on it than we’ve ever seen on a hike. Ever. We started early, and it was already crowded with it being way more so when we were on the way out. If you want a hike that has a lot of people around, pick this. If you want a hike with very few people around, avoid this one.

2. It’s a bit of a bouldering scramble to get to the waterfall.

There is a sign that is posted that points you in the direction of the waterfall and it tells you to just follow the river up stream. What it doesn’t tell you is that you have to scramble down to scramble back up in order to get to a spot where you can see the falls.

IMG_1126.JPEG
IMG_1127.JPEG

3. Parking is free but spots in the lot are very limited.

The lot itself holds maybe 10 cars, if they all park so 10 can fit. Street parking is available but there are signs that designated no parking zones, so be careful when you street park. No one wants a towed car or a parking ticket!

4. There are three separate trails that all go to the same place.

Yes, you read that right. There are THREE trails once you get to the signs that are either for the loop, or Maxwell Falls. If you take the loop, you can pick from upper or lower. If you take Maxwell Falls, you will be running parallel and on the other side of the river than the waterfall. It does not matter which way you go. You can get to the waterfall with any of your choices.

All in, we give this hike a 3.5 out of 5. The sheer amount of people and the amount of dog poop along the trail knocked this one down for us. We are glad we did it - the hike is a great workout and the waterfall was a nice benefit, but we probably won’t be back to do this one again any time soon. Truly too many people for us.

Happy trails!

~ Liz

DSCN0291.JPG
IMG_1120.JPEG
IMG_1112.JPEG
Maxwell Falls Review.jpg